

In the early 1980s, the California Raisin Advisory Board had a big problem. There were a lot of raisins produced every year, and not much demand. According to the board’s own market research, most consumers considered raisins “dull and boring.” And the usual methods of produce marketing weren’t making a difference: no amount of raisin recipes placed in homemaker magazines, raisin fairs, raisin seminars, or Raisin Queen beauty contests had moved the needle on Americans’ indifference toward the dehydrated grapes.
Focus groups offered a clue to the widespread disinterest. The key question was, “If raisins were people, what sort of people would they be?” The answer, “nerdy, wimpy, negative, unhip,” pointed to the need for a radical new advertising effort. And so the rhythm and blues playing California Raisins were born.
With dark sunglasses and moves worthy of The Temptations, the claymation raisins sang and danced to Buddy Miles singing lyrics adapted from the 1968 Marvin Gaye hit, “I Heard it Through the Grapevine.” Commercials featuring the California Raisins won fans immediately, catapulting the animated dried fruit performers into pop stardom. Capitalizing on their popularity, The Raisin Board produced an album, Meet the Raisins, that sold over 600,000 copies. The Raisins got a TV special of the same name, and even starred in a Saturday morning cartoon show in 1989.
But the real win was how the public’s perception of raisins shifted from stodgy to hip. In focus groups, consumers expressed newfound admiration for raisins. And sales quickly shot up, providing an estimated $6 return for every dollar spent on advertising.
These days, there’s no need to don shades, do the step-slide, or croon to get you excited about most dried fruits and veggies. Instead, let’s talk about the flavor, convenience, savings, and fun that comes with dehydrating food.
What is Food Dehydration?
A process of reducing the moisture in food, food dehydration concentrates flavors and allows for longer shelf life. It’s probably the oldest method of food preservation; with a history that might go something like this: One Tuesday, around 14,000 years ago, Ugg and Una absent-mindedly left a piece of fruit on a rock on a breezy, sunny day, and returned on Friday to find that it had dried out instead of growing mold. When they were still nibbling bites of the fruit the following Monday, they knew they had discovered something really useful.
Many cultures throughout history have used dehydration to preserve large amounts of food for later use. Especially in places where food is abundant in summer and hard to find in winter, having stores of dried goods could be the difference between survival and starvation.
Even in the modern world, where food ships globally, and you can find strawberries in Toronto in January and tomatoes in Buenos Aires in July, dehydrating food still has its place. It’s a convenient way to store food — especially large quantities — for a long period of time. It concentrates flavors, and can create chewy textures in plant-based foods that can mimic the mouthfeel of meat (hello, mushroom jerky!). And it makes food lighter and more economical to transport. While a dedicated dehydrator can make the process easier, it’s not a requirement.
This article will introduce you to different methods for dehydrating food, the types of food you can dehydrate, and share some delicious recipes that feature dehydrated foods.
Why Dehydrate Your Food?

There are several compelling reasons to consider dehydrating some of your food.
1. Save money
For one, you can save money. If you grow your own fruits or vegetables, you may experience the end-of-summer “I can’t look at another zucchini” blues. When you get tired of ratatouille and zucchini bread, and your friends and neighbors start running when they see you headed their way, green squash in hand, you may have the urge to let them rot on the vine, or just chuck them straight into the compost. And that’s the same stuff you’ll pay four dollars a pound for six months later.
When you dehydrate those zucchinis (or tomatoes, or okra, or corn, or berries, or apples, etc.), you’re essentially putting those free or low-cost calories, nutrients, and deliciousness into a bank account that you can withdraw from for the rest of the year.
You don’t even need your own garden to save money with dehydration. You can buy produce in bulk when it’s at the peak of ripeness and at its lowest cost (i.e., from farm stands, farmers markets, or grocery stores that stock local produce), and preserve it for the off-season. It’s the kitchen variety of that old stock market adage, “buy low, sell high.” Except, in this case, you’re not selling, but eating.
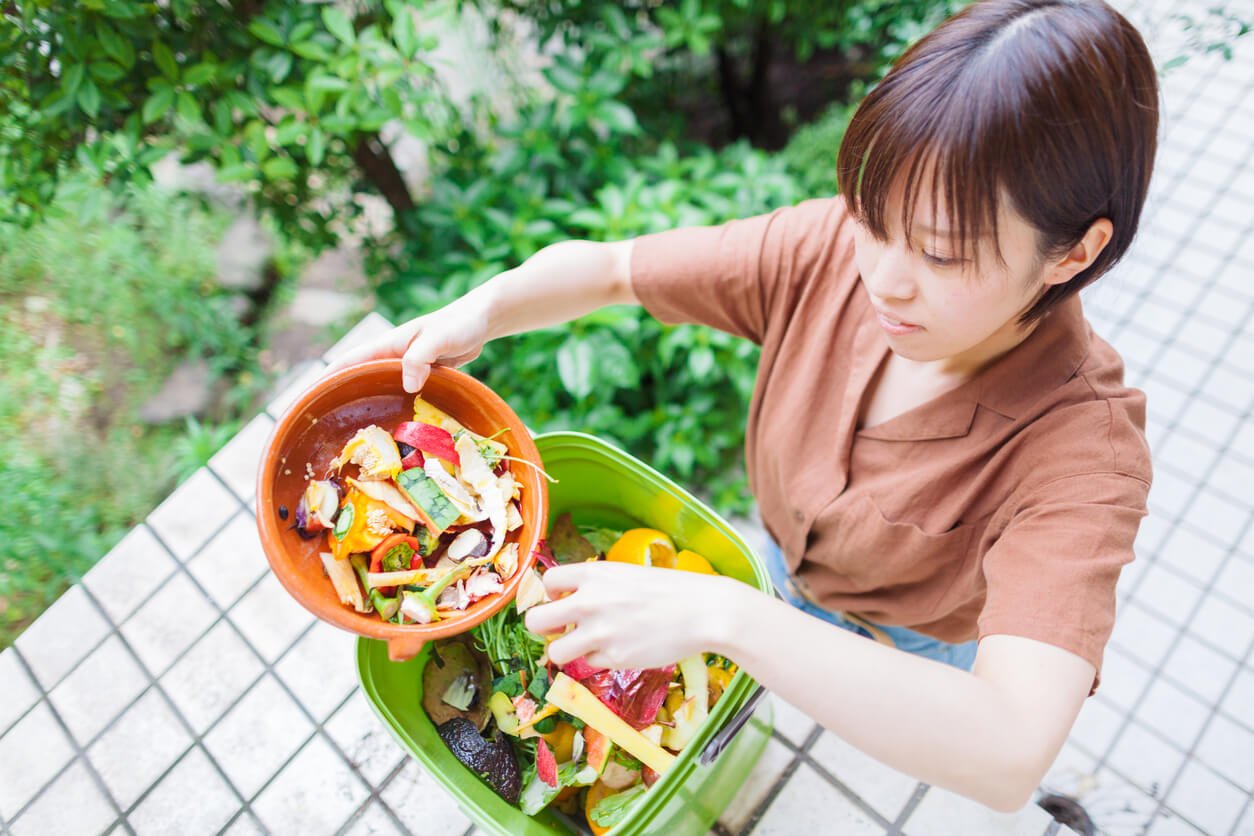
2. Cut down on food waste
Another good reason to dehydrate food is to cut down on food waste. Whether you’re using purchased food or food you’ve grown yourself, you can “upcycle” those calories rather than let them go bad and end up in the compost, or even worse, the trash. Whenever you have more produce than you know what to do with, you may want to consider dehydrating the excess. Doing so significantly prolongs the shelf life of fruits and veggies, so you can use them when you’re ready for them. (Pro tip: Plan ahead on this, and dehydrate produce while it’s still at its peak rather than waiting for it to be halfway rotten, at which point a lot of cleanup may be necessary.)
3. Save space
Dehydrating foods also saves space. Many fruits and vegetables are mostly water, and dehydrating them removes that water, which can reduce their size by half or more, depending on the water content of the original food. If you bring in your harvest of apples and don’t have a root cellar or large enough refrigerator, you can dehydrate them and store them in much less space than they would require fresh. Also, dehydrated apples are a lot less picky about where they need to be stored, so you don’t have to devote valuable counter or fridge space to them.
4. Provide non-perishable options
Finally, dehydrated foods are essentially non-perishable. They’re useful as part of your emergency preparedness, since they last so long and don’t require electricity or refrigeration to remain safe and edible. There’s a reason that the instructions that come with a year’s worth of ReadyWise emergency food supply consist of just three words, “Just add water.”
Even if you aren’t preparing for a year’s worth of dining in the absence of supermarkets, farms, or gardens, dehydrated foods are also great for camping, and taking on long hikes or trips where you don’t have access to cooking equipment. Some avid campers dehydrate entire meals, since they’re lightweight and won’t spoil, and then rehydrate and eat them when they have access to water and heat.
Common Dehydrating Methods
Since humans have been dehydrating food for thousands of years, we clearly don’t need expensive, cutting-edge machines and appliances to accomplish the task. A range of methods, from the very natural to the very technological, are available to us. If you’ve ever forgotten greens in the fridge until they wilted and dried up, you’ve already proven that you’re a natural at dehydration!
Sun Drying

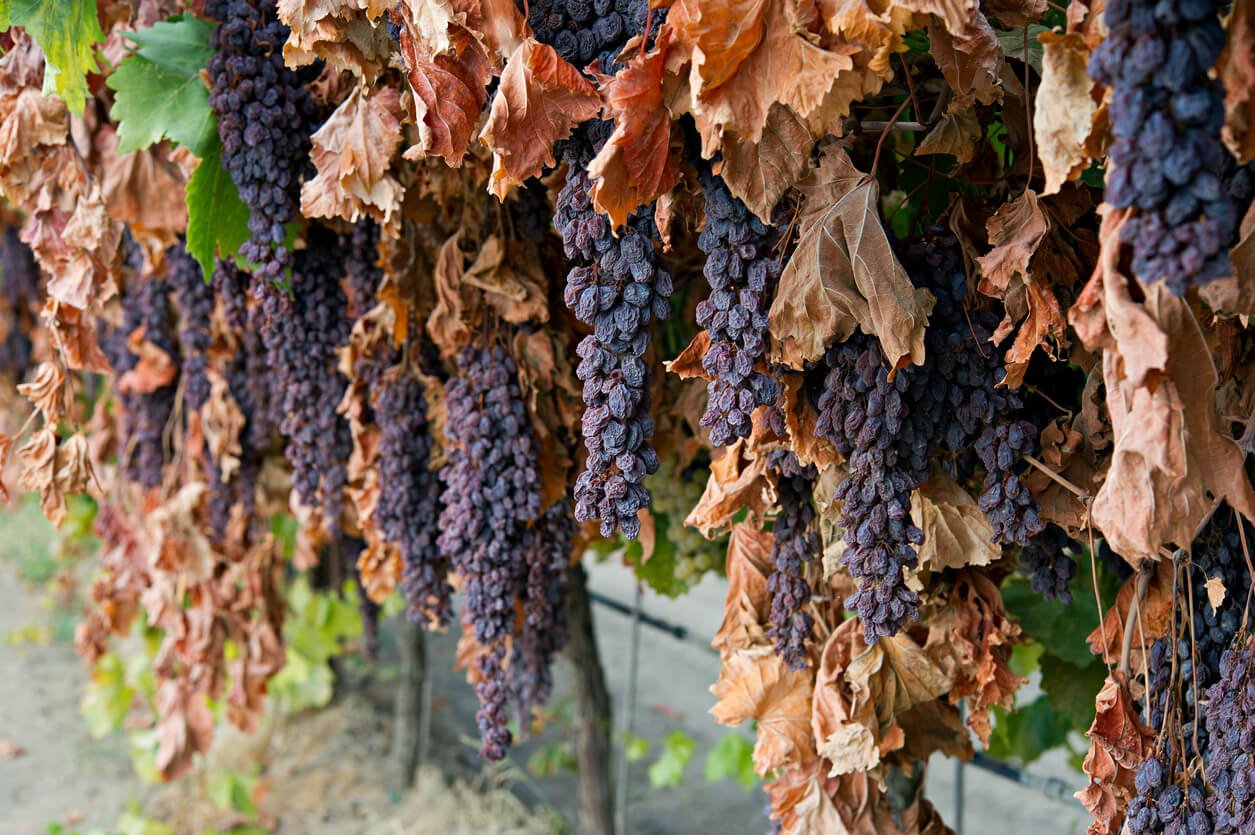
Sun drying is just what it sounds like: exposing food to direct sunlight during the day. It requires several conditions, though: long days, high heat, and low humidity. Places like the southwestern US in summertime are the best options for sun drying. If a location is too humid, or doesn’t reach average temperatures of 85° F or higher, the produce will probably mold before it dries sufficiently.
Even under favorable arid and hot conditions, it’s wise to restrict sun drying to fruit, not vegetables. Food dried in the sun can take three to four days to dehydrate fully. Fruit, with its high sugar and acid content, can resist mold formation during that time, and therefore, remain safe to eat after dehydration. Since most vegetables are low in sugar and acid, don’t dehydrate them in the sun, as they will likely spoil.
What’s the relationship between dehydration and spoilage? It turns out that drying out food doesn’t actually kill the microbes that can spoil food and make it unsafe to eat. Instead, the lack of water inhibits the growth of those microorganisms — bacteria, mold, and yeast — so they remain dormant and unable to colonize the food.
Sun drying requires more than just the ideal climate and day length, however. You also need to create airflow around the food, by proper spacing and by placing the pieces on mats, racks, or screens that allow air to circulate from all directions. Metal racks increase the drying temperature, so the best screens are stainless steel, Teflon-coated fiberglass, and plastic. Don’t use hardware cloth (it’s coated in zinc or cadmium), copper, or aluminum to avoid heavy metal contamination.
Air Drying

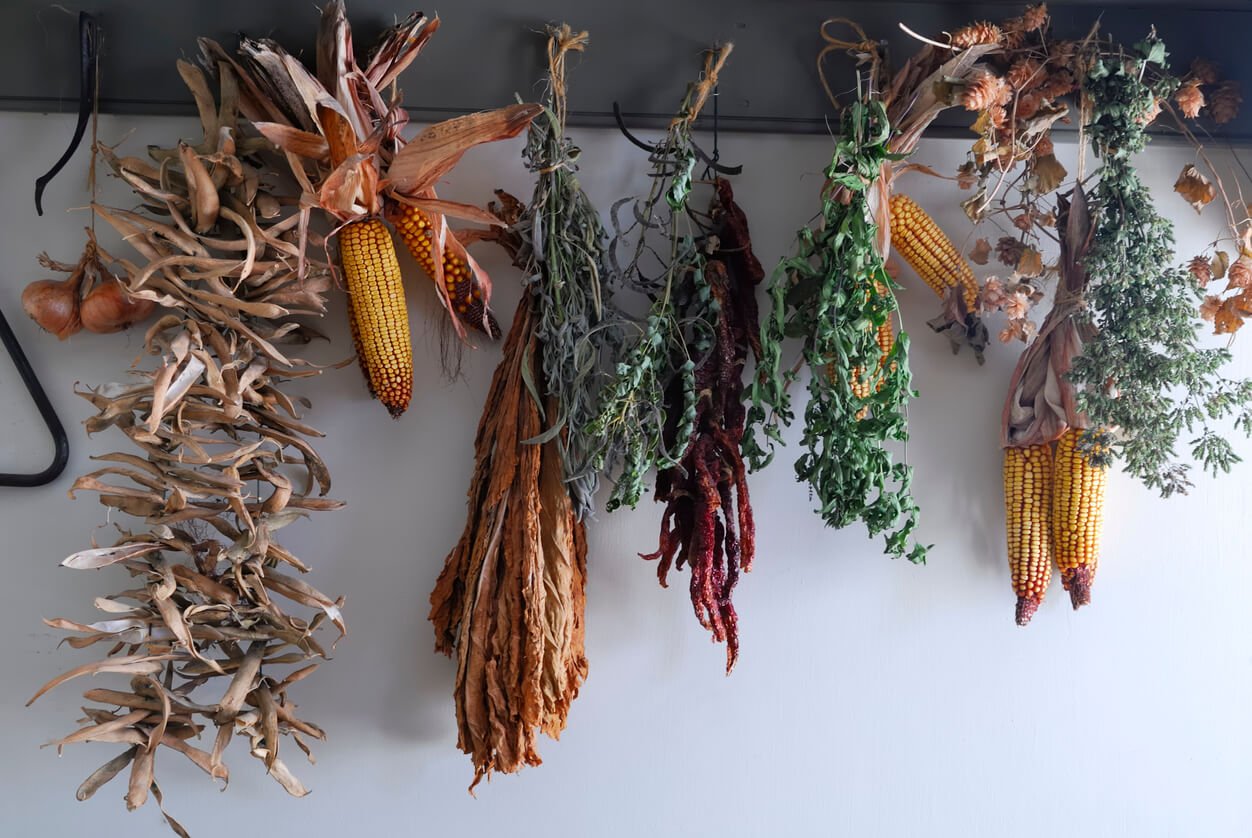
Air drying can be done indoors or outdoors. The key requirements are airflow, low humidity, and no direct sunlight. Air drying usually takes place indoors, in a well-ventilated attic, room, or screened-in porch, or outdoors under an overhang that blocks the sun. Common air-dried foods include herbs, mushrooms, and hot peppers.
Herbs are perhaps the easiest items to air dry. If you lay them out on a rack, herbs can dry fully in two to three days. To save space, you can tie herbs together in bundles and hang them from hooks or rafters. This method can take two to three weeks, and has the added benefit of making the space smell wonderful during that time.
A variation on air drying is “curing,” which is done to onions and garlic after harvest, to help them store well. To do this, after harvesting, leave onions or garlic in a warm, dry, well-ventilated location, such as a shed or garage. Spread them out in a single layer on a clean, dry surface, or hang them from the rafters. After a couple of weeks, the tops and necks should be thoroughly dry, and the outer bulb peel should begin to rustle. Cut off the dry foliage above the bulbs, and trim off any roots before using.
Freeze Drying
In freeze drying, food is frozen and then placed inside a vacuum. The water frozen within the food then sublimates, which means that it turns directly from ice into vapor, skipping the liquid stage entirely. This process allows the food to retain much of its original texture, flavor, and nutrition when rehydrated.
Freeze drying is generally just done commercially, but you can experiment with it using your home freezer, as long as you can get the temperature below 0° F. (If you’re really keen and have a few thousand dollars to spend, and a fair amount of space, you can pick up a consumer model freeze dryer and go wild.)
Assuming you’re going to try freeze drying in the freezer compartment of your kitchen refrigerator, or a standalone chest freezer, here’s what you do: cut fruit or veggies in very thin slices and place them on a rack in your freezer. After a week or so (depending on how cold your freezer is and how thick the slices are), the slices will completely dry out. Remove them from the freezer and store them in airtight containers (glass, stainless steel, or ceramic) in your pantry or freezer.
Oven Drying
If your kitchen has a standard oven, you can use it to dehydrate some foods. The downsides include high energy costs, as ovens are inefficient at drying, and compromised quality (darker, more brittle, and less flavorful foods), since the minimum temperature of most ovens is above the ideal temperature for drying.
If you’re going to use your oven, set it to no higher than 140° F, or the “warm” setting if it has one. Leave the door ajar so moisture can escape. If you have a convection setting (which turns on a fan to move the air around), use it. If not, place a fan on the outside of the oven and point the air into the gap left by the open oven door. Expect that oven drying will take two to three times longer than using a dedicated electric dehydrator (see below). And limit the capacity of the oven to four to six pounds of produce at a time.
Electric Drying
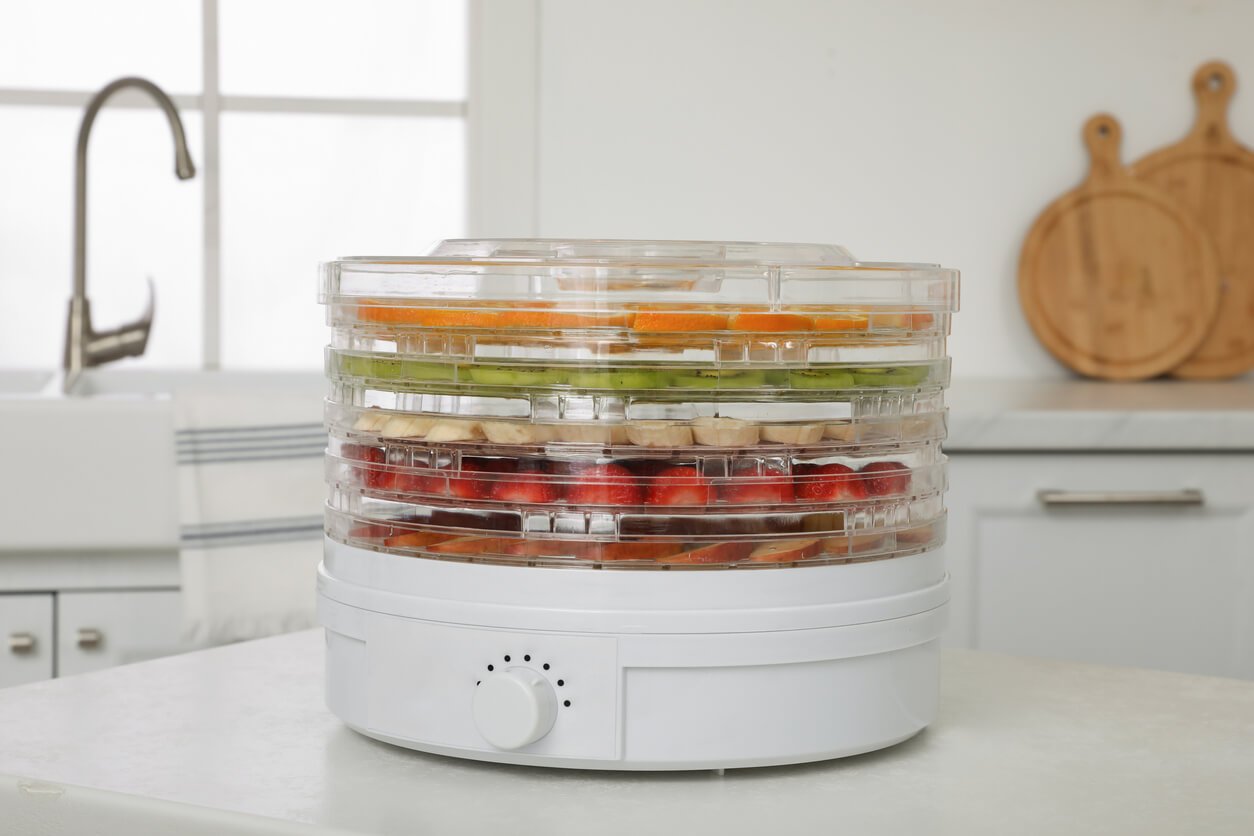
Dedicated electric food dehydrators produce a higher quality and more consistent dried product than any other method that’s available to most of us (freeze drying may be the very best, but the cost puts it out of reach for most home chefs and gardeners). Since they are self-contained units that include an adjustable heat source, ventilation system, and trays that allow airflow, you can dry your food at the right temperature for optimal results.
There are two basic types of electric dehydrator. Vertical dehydrators have their heat source and fan either at the top or the bottom, and blow that air vertically. With this type, you stack the trays on top of each other, and you can add more trays as needed.
Horizontal dehydrators send warm air from the back to the front. These units are generally better insulated than the vertical ones, which increases energy efficiency, improves the uniformity of heat distribution, and dries food faster. The horizontal airflow also reduces mixing of flavors when you dry different foods on different racks. Horizontal dehydrators are more expensive than vertical ones.
Both can handle pretty much any simple type of food you’d like to dehydrate, such as fruits, vegetables, and even soaked nuts. Horizontal units, however, tend to be preferred for things like making your own crackers or kale chips, because they are square instead of round, and you can leave more space between trays, just like oven racks.
When it comes to counter space, vertical models will take up about as much room as an Instant Pot, while the horizontal ones can be as big as a large microwave oven, depending on how many trays they have.
What Foods Can You Dehydrate?
Technically, you can dehydrate any food that contains water. Heck, you can probably toss soggy tennis shoes in your dehydrator, and they’ll come out drier, too. But let’s stick to things you should dehydrate, like foods you’ll actually eat, are healthy for you, and are good for the planet.

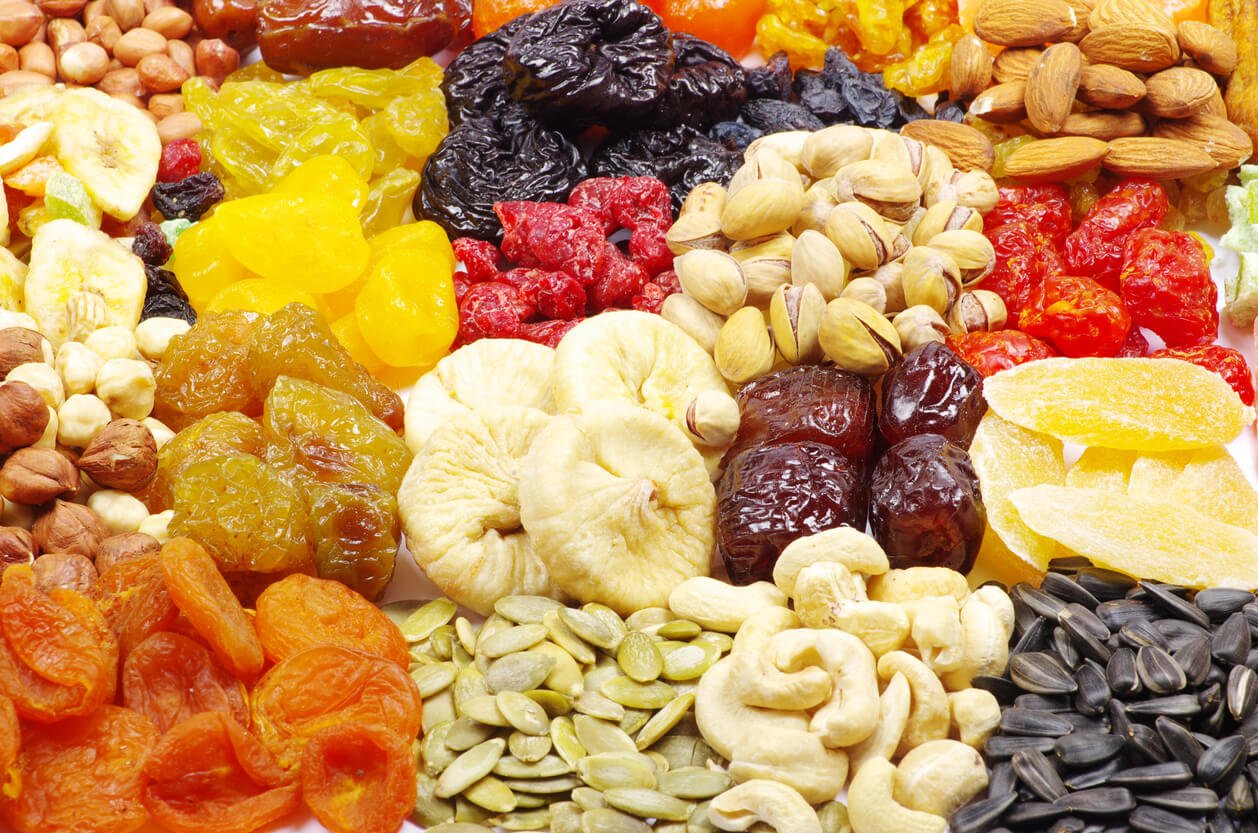
Fruit
Fruits are perfect dehydrator material. You can slice some fruits thinly or cut them into small pieces, like apples, bananas, strawberries, pineapples, pears, peaches, and kiwis, for example. Berries can be left whole — raspberries and blueberries end up with a wonderfully concentrated flavor when dried. You can also blend some fruits with a little water and dry the puree on sheets, making fruit leathers. (This is one kind of leather that even ethical vegans can get behind.)
Dried fruit goes great over granola and oatmeal, in salads, and as a standalone snack.
Vegetables
Most vegetables should be cut into small pieces or thinly sliced (roughly ⅛” thick) — a mandoline or food processor with a thin blade will work; just make sure to protect your fingers. Some veggies like corn and peas don’t need to be cut at all if they are loose and not on the cob or in the pod.
You can dehydrate leafy greens like spinach and kale just as they are. Simply wash them, remove any thick stems, and then cut or tear them into pieces that will fit on your dehydrating sheets or in your dehydrator. Because they’re so high in water, greens will reduce in volume significantly. (If you’ve ever sauteed a giant heaping mound of spinach into a tiny lump the size of a kitchen sponge, you know how much water can be removed from greens.) You can store them as whole leaves, or turn them into a nutrient-dense and flavor-packed powder using a blender or food processor.
You can also make kale or collard chips by chopping the leaves to a consistent size, and then coating them in a seasoning mix before dehydration.
Add dehydrated veggies to soups, stews, and portable dehydrated meals. Some veggies also dehydrate in ways that resemble meat, so you can make mushroom jerky, carrot bacon, and so on by marinating the sliced vegetables prior to dehydrating.
Nuts, Seeds, & Grains
Nuts and seeds are easy to dehydrate. But they’re also easy not to dehydrate, and they last a long time anyway, so why would you even want to go to the trouble? The answer is, soaking nuts and seeds before dehydrating them makes them easier to digest and can provide more nutrients. But once they’re soaked, they can go bad quickly. You can have the best of both worlds by first soaking your nuts and seeds until they begin to sprout, then dehydrating them to make them last.
You can use the same principle to store sprouted grains, which you can also use in breakfast cereal and dehydrated meals.
Legumes
You might not think about dehydrating legumes, but if you have bags of dried beans or split peas or lentils, those are legumes that were probably sun dried on the vine. Canned beans work best for dehydrating, though you can also dehydrate beans that you’ve cooked in a home pressure cooker.
You can cook lentils on the stovetop until tender, or use canned lentils. You’ll want to rehydrate your legumes by cooking them a second time before eating them. Not only will the double cooking make the legumes more digestible, but you can use the dried beans or lentils in dehydrated meals, as they’ll cook much faster than regular dried legumes.
Herbs
Herbs are great for dehydrating in an electric unit. And making your own dried herbs gives you a huge culinary leg up compared to store-bought dried herbs, which will rarely be as fresh or flavorful as those you dry yourself. Whether you grow your own, or pick up fresh herbs at a supermarket or farmers market, you can enjoy dried herbs in teas, for cooking and baking, and even in crafts like sachets and eye pillows.
Downsides to Dehydrating Food
Dehydrating food can save money, energy, and time. It can concentrate flavors and prevent spoilage and waste. And it’s free and easy to do, if you’re willing and able to use sun or air-drying techniques. At this point, you might be thinking, let’s dehydrate everything! Why not?

Sugar Concentration in Dried Fruit
Well, there are a couple of downsides to dehydrating foods as well. The first is specific to fruits: the sugar concentration and glycemic index go up with a lack of moisture. This means that the sugar found in fruit can absorb more rapidly in your body and cause a spike in blood sugar, especially if you eat that dried fruit by itself.
It’s nothing personal, just math. If fruit is mostly water, and that water is removed, there’s now a lot more sugar per unit of weight.
And speaking of weight, since there are four calories per gram of sugar, you are now dealing with a much more calorically dense food. Which means it’s easy to overdo it if you’re concerned about overall caloric consumption, or are sensitive to large quantities of fruit sugar. It’s way easier to snack through a one-pound bag of banana chips than it is to eat 21 medium bananas, but you’ll get the same number of calories (about 2,200) either way.
If you’re getting your dried fruit from the store, check the label to see if there’s added sugar on top of the naturally occurring variety. You generally won’t see sugar added to raisins or apple rings; more commonly, manufacturers enhance sour or tart fruit, such as cranberries and cherries, with sugar.
Destruction of Nutrients
A second concern is there may be destruction of certain nutrients in the dehydration process. Vitamin A is destroyed by exposure to light, and vitamin C is destroyed by heat. Treating fruit with sulfite before dehydrating can mitigate these losses, but has the side effect of destroying thiamin and can also trigger allergies for some people. Blanching, or briefly boiling vegetables prior to dehydration, can also result in some loss of vitamin C and B-complex vitamins and minerals, as all these nutrients are water-soluble.
It’s not all bad news, though. It turns out that dehydrating is comparatively one of the gentlest methods of preserving food, as it protects more nutrients than alternate methods such as canning or pickling.
Can Take a While
And third, dehydrating food takes much longer than eating it raw, or cooking it. Although prepping food for dehydration doesn’t take much more time than prepping it for cooking, the drying process is lengthy, depending on the drying method used and the size and amount of moisture in food pieces. Most drying methods take at least four hours, and often much more. Sun drying requires the most time. And using an electric dehydrator is quickest.
Energy Usage
And finally, certain methods of dehydration, such as freeze drying, electric drying, and oven drying, use energy, which incurs additional costs and causes environmental impact.
How to Prepare Food for Dehydration
Select fresh, high-quality produce — awesome fruits and veggies at their height of ripeness — for dehydrating. Trim away any undesirable seeds, core, or damaged portions.
In general, cut produce into halves, strips, or slices ranging in thickness from ⅛-inch to ¼-inch thick. Regardless of cut, the principle is that they can dry readily. Consistency of size is important, too, so the pieces all dry in the same amount of time.
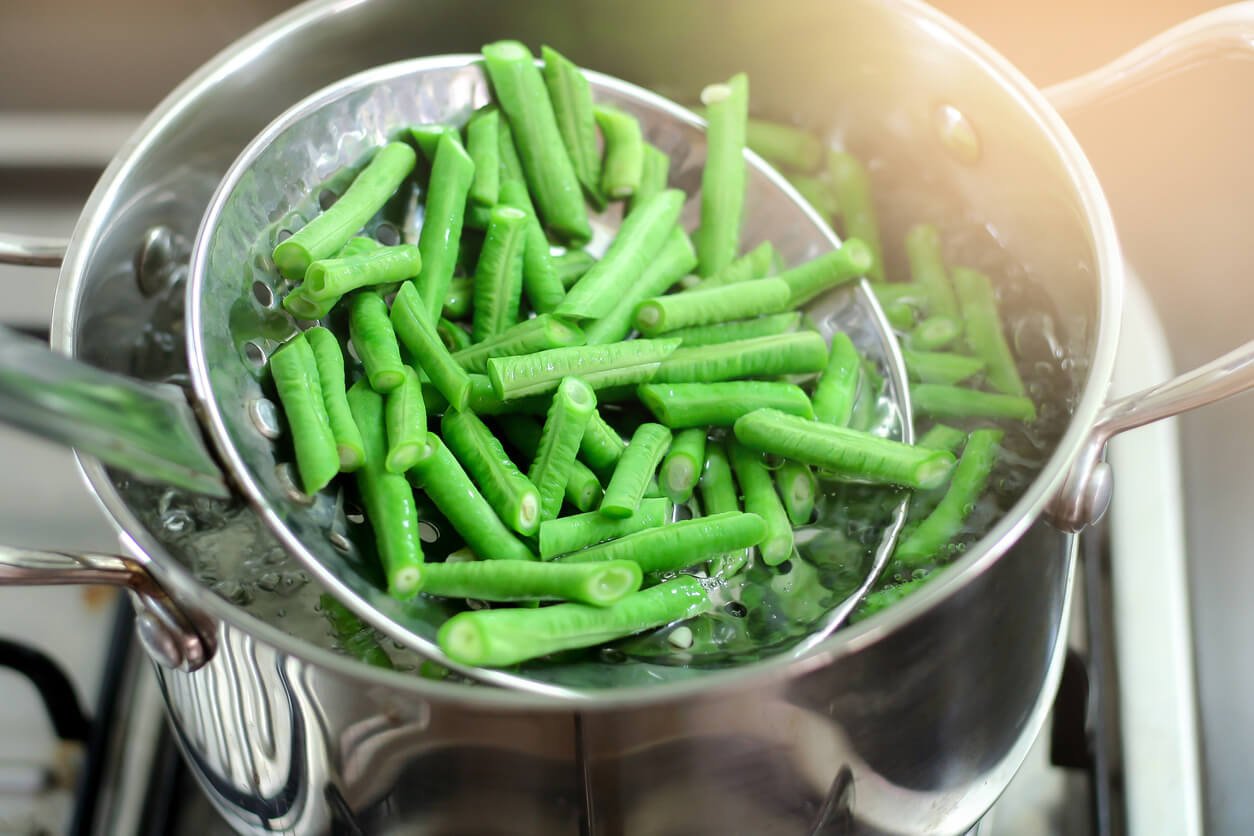
For vegetables, blanch by immersing in boiling water. You do this both to preserve the vegetables’ vibrant color and flavor and to neutralize any enzymes that might otherwise lead to spoilage.
You can also pretreat most fruits by dipping them in an antioxidant solution to slow down browning. Make the solution by mixing in ½ teaspoon of Vitamin C (ascorbic acid), lemon juice, or other acidic liquid per quart of cold water. Dip the fruit for one minute, then drain and put directly on the rack to begin drying. Here’s a comprehensive guide to prep and blanching times for both fruits and vegetables.
Dehydrating Tools to Have On Hand

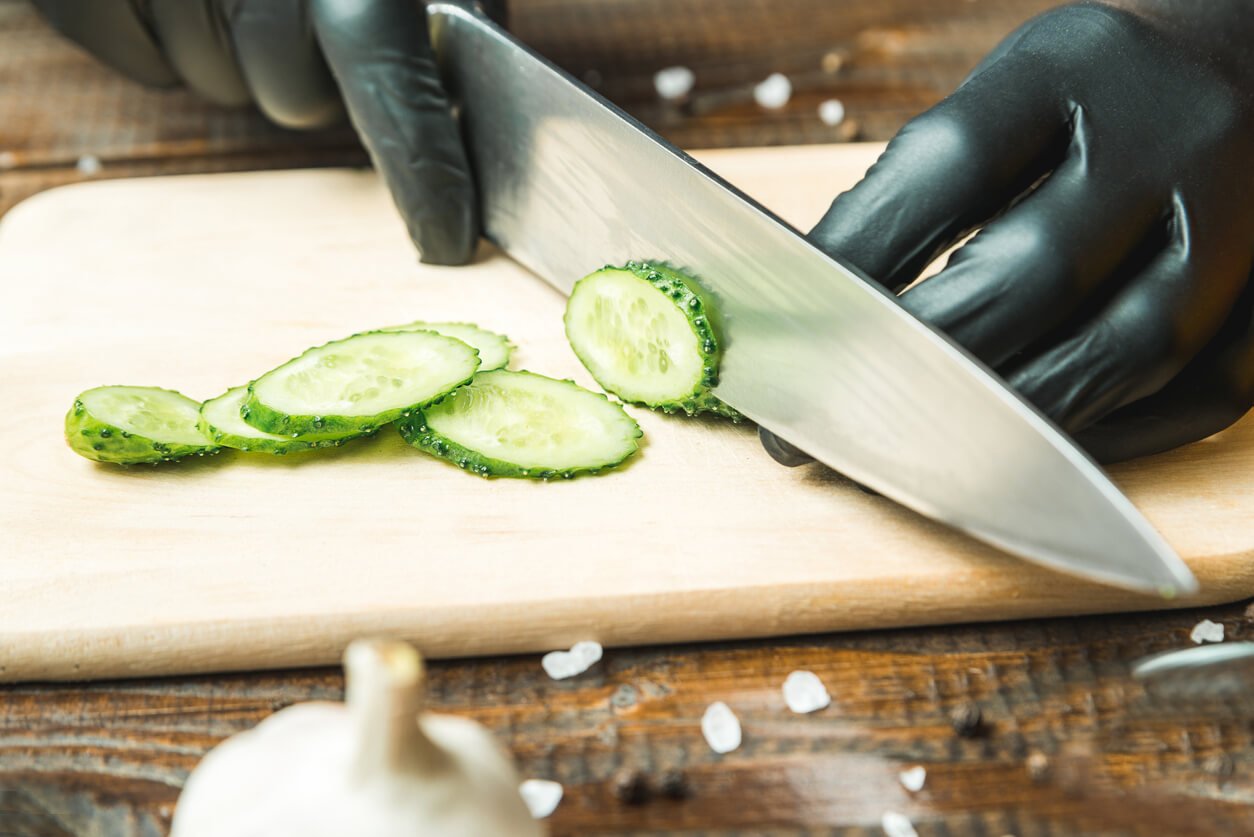
You can get started dehydrating food with common kitchen tools. You’ll want a sharp knife and cutting board, or if you’re adventurous and willing to wear cut-resistant kitchen gloves, a sharp mandoline.
If you are drying vegetables, you’ll also need a large pot with a strainer basket to blanch them before dehydrating. Blanching involves dunking the veggies in boiling water for a short time and then cooling them rapidly, so the strainer basket will help you get the veggies out of the boiling water in a hurry without having to pour the water out. If you want to make fruit leather (or fruit roll-ups, if you prefer the more vegan-sounding name), you will want a blender or food processor.
And if you’d like your garden greens and veggies to come out of the dehydrator bug- and dirt-free, then a rinse should be followed by a trip through a salad spinner, which can be your best friend, or at least an amiable companion. For best results, play carousel music while you spin the veggies, or at least go “wheee” a couple of times while they revolve.
If you’re serious about dehydrating, you’re probably going to get an electric dehydrator at some point — either a vertical or horizontal model. Here are several to consider:
Horizontal dehydrator units:
Vertical dehydrator units:
Storing Dehydrated Food
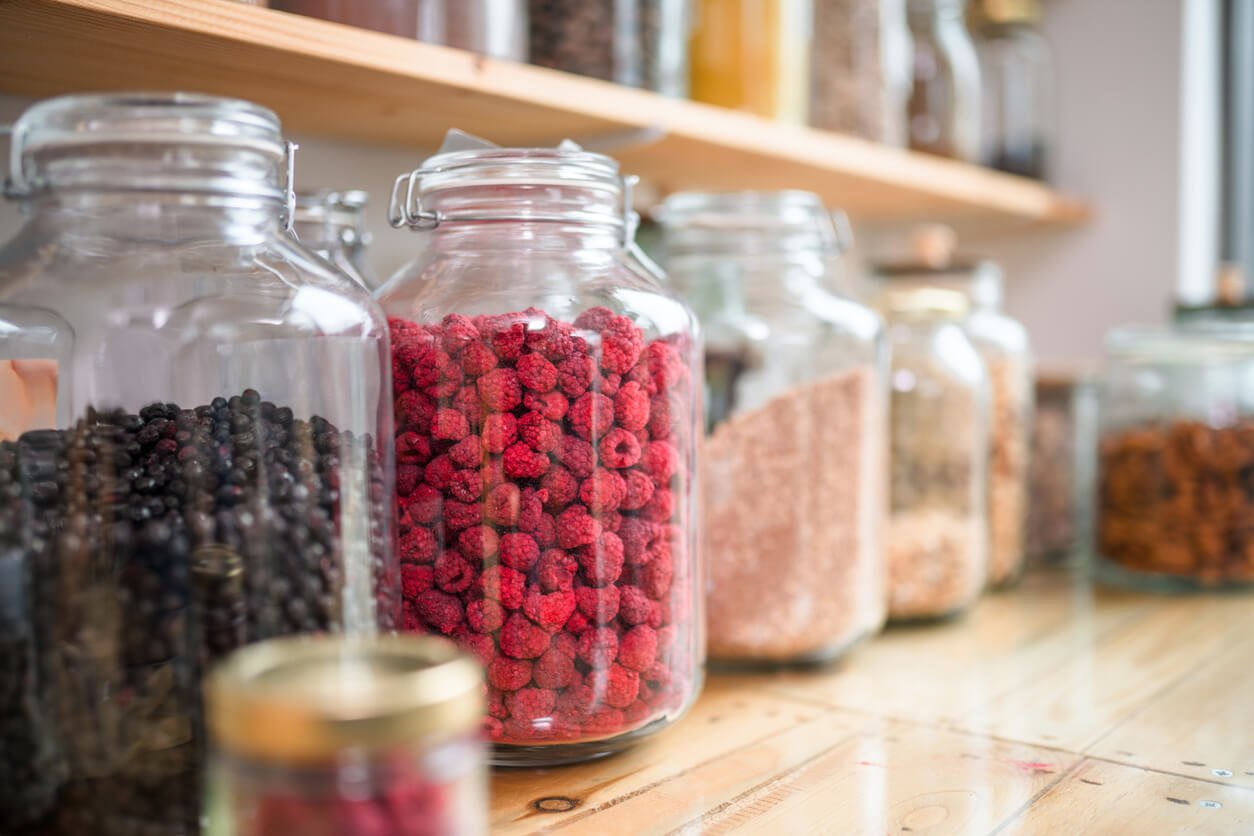
Once the food is thoroughly dried, allow it to cool, and make sure it’s completely free of moisture before storing. A good rule of thumb to test dryness is to lightly pack the product into a tightly sealed jar and check for condensation on the lid. If you find condensation, you need to dry it more – otherwise, it won’t keep – or store it in the freezer or refrigerator.
Even if there are no obvious signs of moisture, it’s a good idea to keep the dried food pieces in an airtight container for about a week, a practice known as “conditioning.” Shake the jar daily to make sure any moisture is spread out evenly among all the pieces.
Once you’re ready to store your dehydrated food, you have a few options. You can pack it tightly into clean and dry glass jars, freezer-safe containers with tight-fitting lids, or nontoxic freezer bags. If you have a vacuum packing machine, that’s also a good option — just realize that once you break the seal, moisture can find its way in again.
Whatever method you use, store dried foods in a cool, dry, dark place for maximum shelf life. Recommended storage times for dried foods range from four months to a year, depending on the ambient temperature. Because food quality is degraded by heat, the higher the temperature, the shorter the storage time. For example, most dried fruits can last for a full year at 60ºF, and just six months at 80º F. Vegetables have about half the shelf-life of fruits.
Dried herbs will retain their potency for up to a year, as will cooked or soaked and then dehydrated beans and grains.
Recipes for Dehydrated Foods
If you’re new to dehydrating foods, we have a fun challenge for you — try one of the recipes below! We think you’re going to fall in love with this way of preserving food and creating amazing cuisine. If you’re already a dehydrating enthusiast, we hope you find some new inspiration below!
The Mushroom Bacon is tasty and satisfying on salads, in grain bowls, or as a topping on a plant-based burger. The “Cheesy” Chickpea Croutons are irresistible as a snack and also add delicious flavor and crunch to soups and salads. Swap out fried potato chips with the Lemon Garlic Dill Squash Chips. And create countless combinations of fruit leather using Mixed Berry and Banana Fruit Leather as your guide. You can even get the kids or grandkids involved in granola bar making by dehydrating Pumpkin Pecan Granola Bars into a crunchy and healthy snack-on-the-go. Once you’re done, make sure to share your dehydrating experience with us!
1. Mushroom Bacon
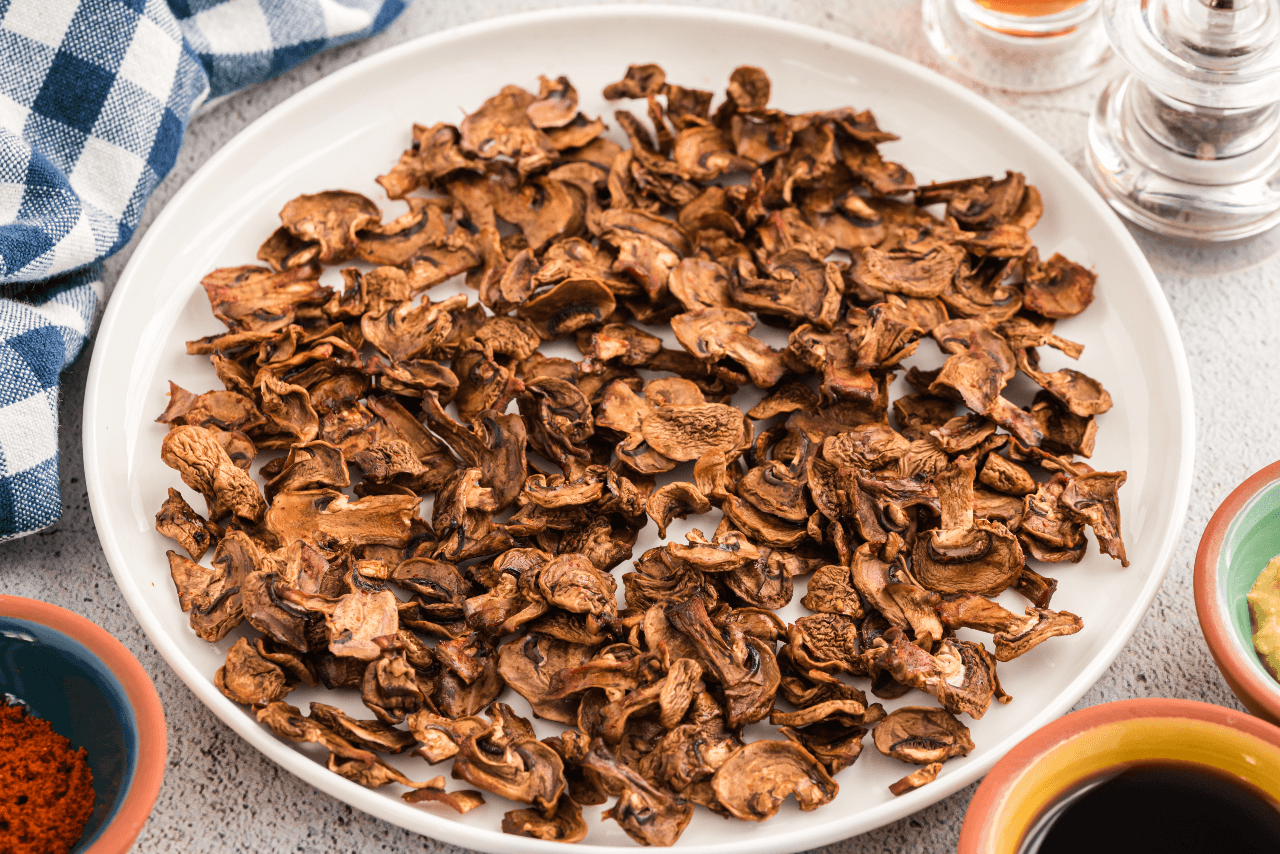

The beauty of mushroom bacon (besides being healthier than traditional bacon since it’s dried and not cured — and is from a plant and not an animal) is that you can use just about any mushroom you like. We chose button mushrooms, but you could try this recipe with shiitake, portobello, or cremini instead. They’ll all be savory and scrumptious!
2. Cheesy Chickpea Croutons
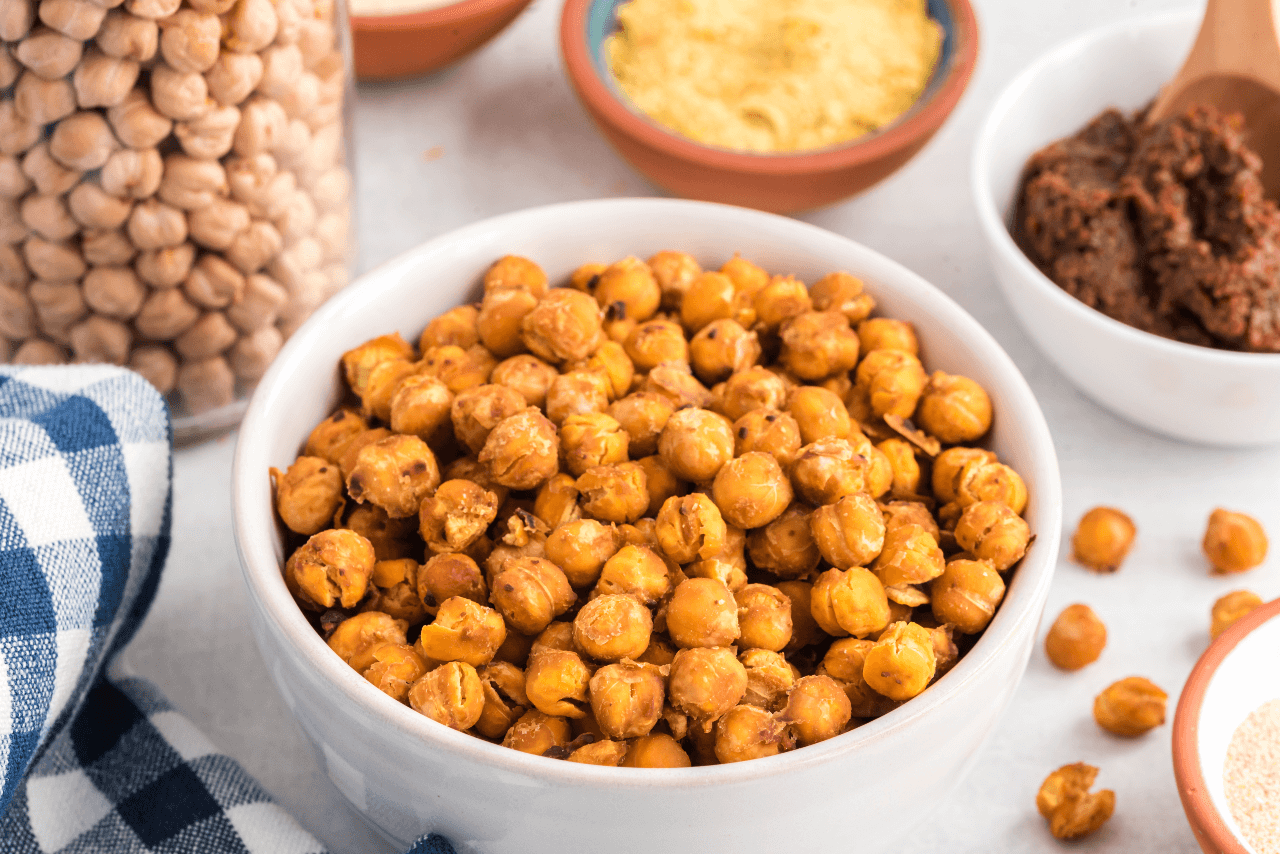
Dehydrating chickpeas simply changes the texture from soft to crunchy, creating a unique experience and new use for chickpeas! Cheesy chickpeas can serve as a fun and crunchy snack, as a topper for your kale caesar salad, or on top of vegan broccoli cheddar soup.
3. Lemon Garlic Dill Squash Chips
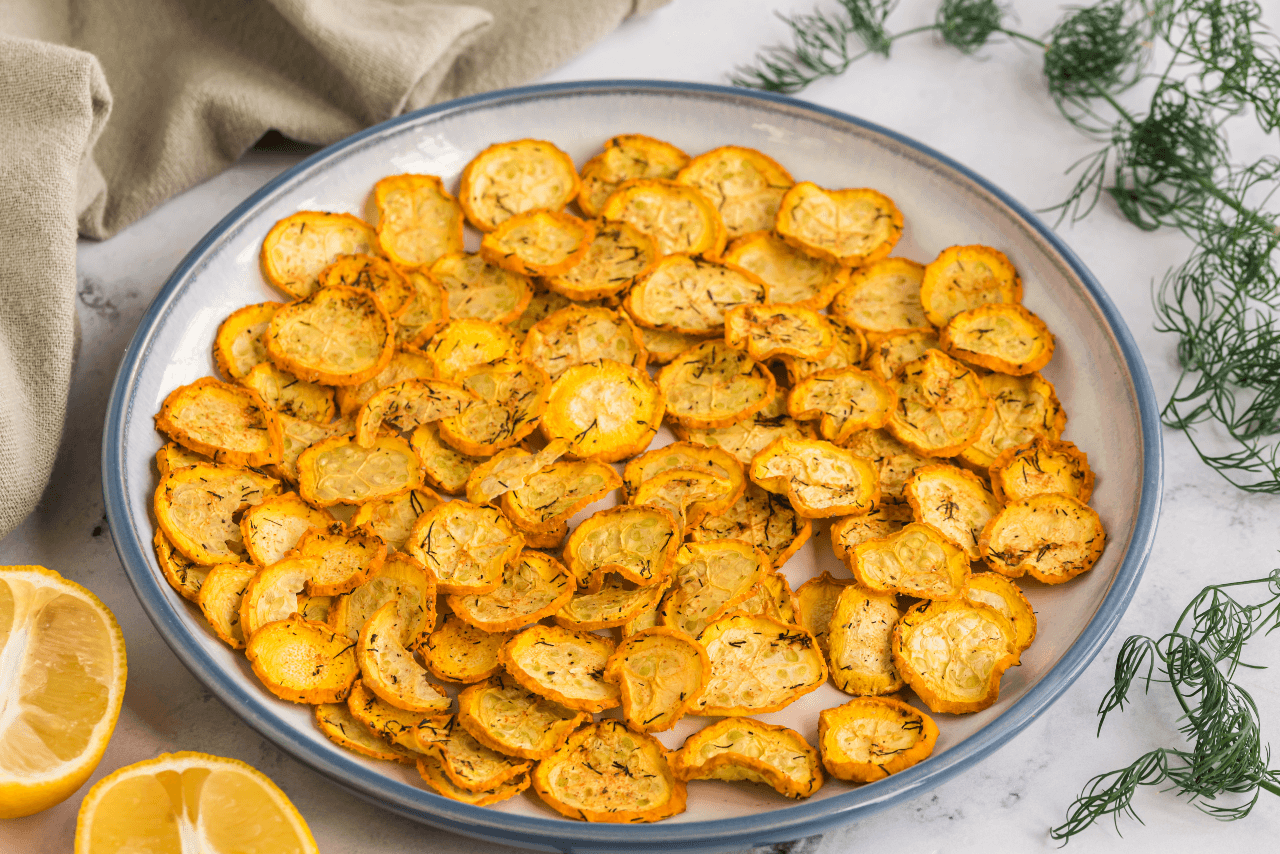
Are you a crunchy snack lover? Make thinly sliced squash your best friend by combining it with any spice blend you love, and then dehydrate it for a healthy crispy treat. Try the lemon garlic dill chip if you’re looking for something bright and refreshing that’s packed with nutrition like fiber, carotenes, and vitamin C!
4. Mixed Berry and Banana Fruit Leather
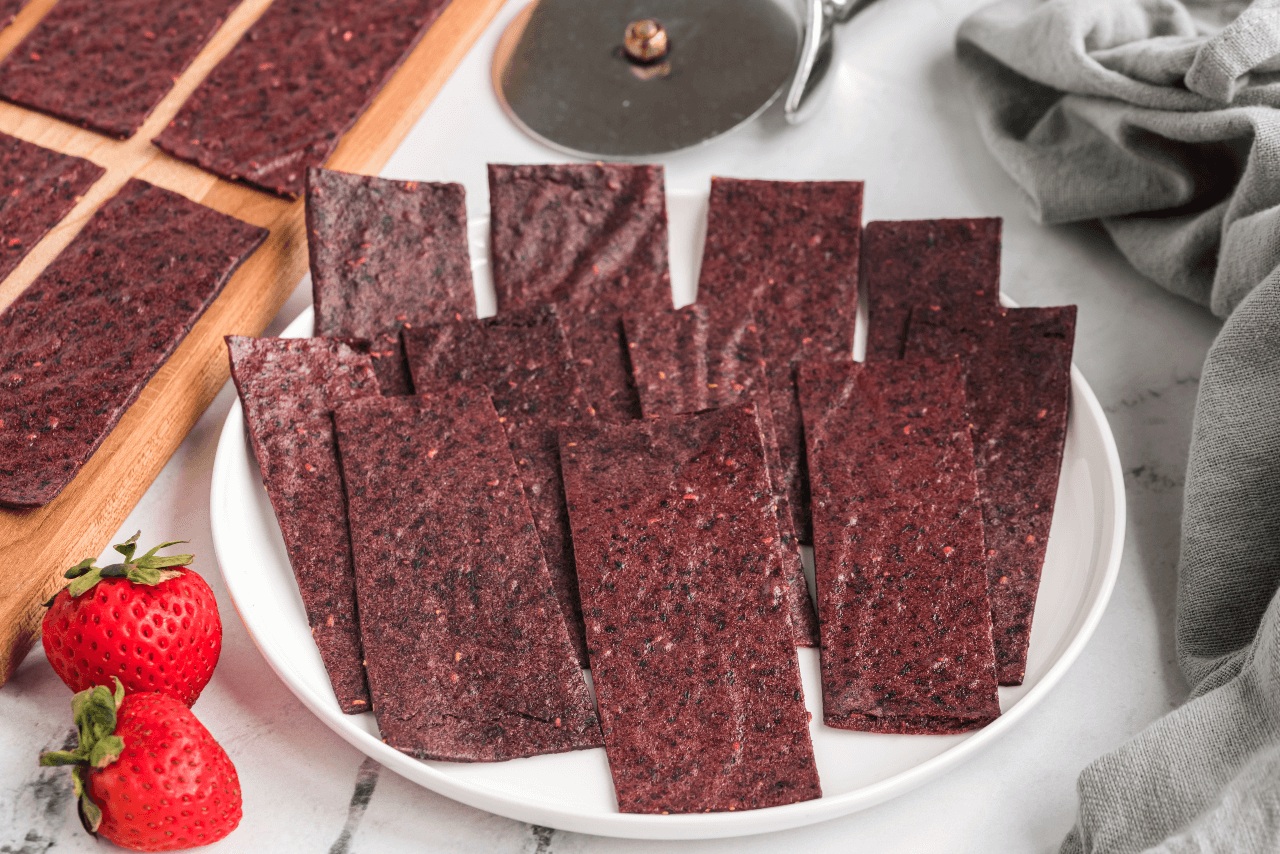
Store-bought fruit snacks can include processed sugar — sometimes more sugar than fruit! Making your own fruit leather at home is not only healthier, but it’s also lots of fun! Plus, it gives you an opportunity to use and preserve any fruit you think might go bad before it’s eaten. Options for creating fun fruit snacks are endless, from pineapple mango to apple kiwi to berry banana. Use this recipe as a guide for all of your fruit leather creations to come!
5. Pumpkin Pecan Granola Bars

Need a snack on the run or something healthy and energizing the kids can bring to school? Unlike store-bought bars, our dehydrated Pumpkin Pecan Granola Bars are made with 100% whole food ingredients using dates as a sweetener, healing spices (not flavoring!), and whole pumpkin and pecan. Customize them by adding your favorite flavors, like vegan chocolate chips, dried apricot, or apples.
Give Dehydrating a Try
Dehydrating food can save money, space, and cut down on food waste, along with being a convenient method of food preservation that’s beneficial for hiking and emergency preparedness.
There are many ways to dehydrate food, from free, seasonal, and time-consuming (sun drying or air drying) to moderately priced and convenient (an electric dehydrator).
And you can dehydrate many different kinds of foods, including some of the healthiest foods on the planet (fruits, veggies, soaked nuts and seeds, and even pre-cooked legumes).
As long as you consume dehydrated foods in moderation, drink plenty of water, and keep eating plenty of fresh produce as well, this method of preserving food is a great way to keep a variety of plant-based foods for long periods of time while retaining much of their nutrient density, and sometimes, even enhancing their flavor.
Tell us in the comments:
- What kinds of dried foods have you tried?
- Have you ever dried your own herbs or greens?
- What’s one food that you’d like to try dehydrating so you can enjoy it year-round?
Featured Image: iStock.com/Shironosov